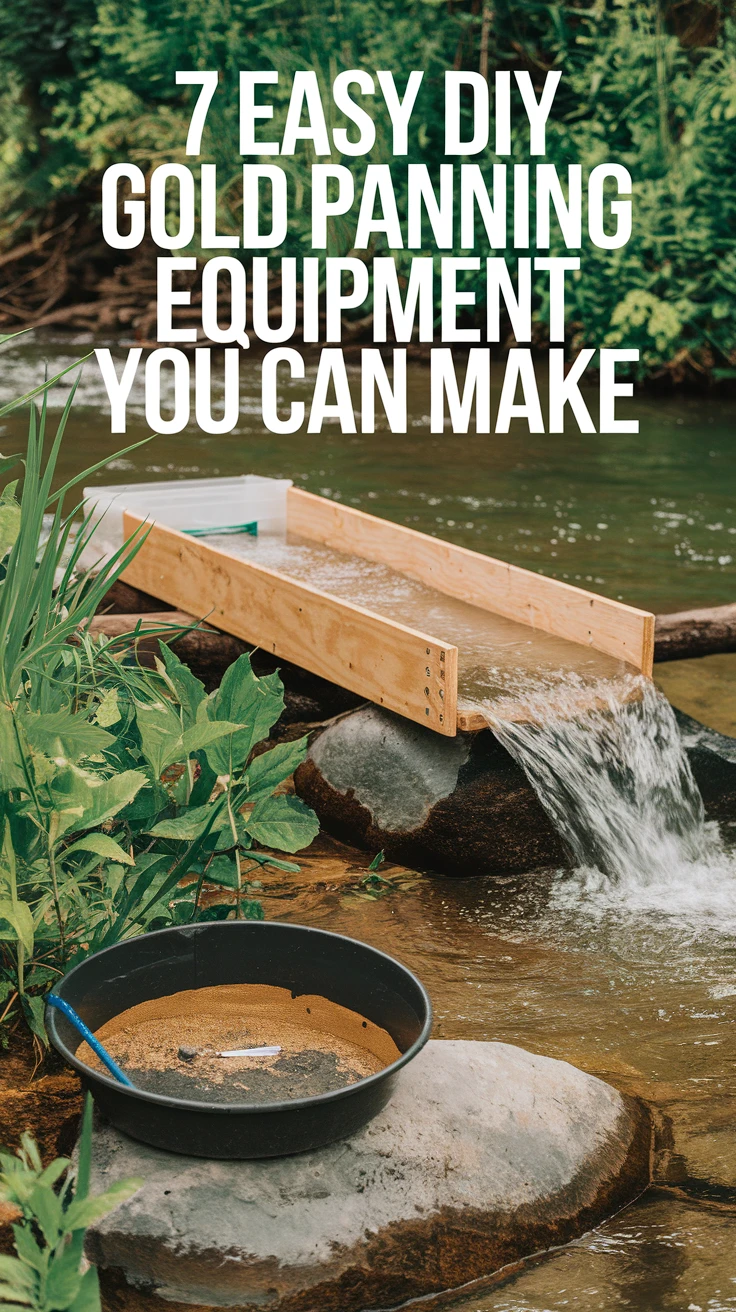
Introduction to DIY Gold Panning Equipment
Gold panning is not just a hobby; it’s a thrilling adventure that connects you with history while offering the tantalizing possibility of striking it rich. Whether you’re a seasoned prospector or just starting out, creating your own DIY gold panning equipment can be both cost-effective and incredibly satisfying. After all, there’s something special about finding gold with tools you’ve crafted with your own hands.
The beauty of making DIY gold panning equipment lies in its accessibility. You don’t need to spend hundreds of dollars on fancy gear to get started. With some basic materials from around your home or a quick trip to the hardware store, you can be ready to hit the streams and start your treasure hunting journey. Plus, when you make your own equipment, you can customize it to suit your specific needs and preferences.
- Save money compared to purchasing commercial equipment
- Customize tools to fit your specific needs
- Experience the satisfaction of using equipment you made yourself
- Get started quickly without waiting for specialized gear to arrive
Pro tip: Before creating any DIY gold panning equipment, research local regulations regarding gold panning in your area. Some locations require permits or have restrictions on the types of equipment that can be used.
1. Homemade Gold Pan
The gold pan is the most fundamental piece of DIY gold panning equipment and the perfect place to start your gold prospecting journey. While commercial pans are readily available, making your own can be surprisingly simple. I remember my first homemade pan – it was nothing fancy, just a modified plastic serving bowl, but it led to my first gold find and sparked a lifelong passion.
- Use a large, shallow plastic bowl or an old metal cooking pan
- Look for dark-colored materials (black or green) to make gold flakes more visible
- Ensure your pan has sloped sides with at least one flat edge for controlling water flow
- Sand down any rough edges to prevent gold flakes from getting caught
- Consider adding small ridges or riffles along one side to catch gold particles
Creating your own gold pan gives you complete control over the size and shape. Commercial pans typically come in 10-14 inch diameters, but you might prefer something smaller for easier handling or larger for processing more material. The key is finding that sweet spot between capacity and manageability. Remember, gold panning requires patience and technique more than fancy equipment.

View on AmazonAs an Amazon Associate, I earn from qualifying purchases.

View on AmazonAs an Amazon Associate, I earn from qualifying purchases.
Pro tip: Test your homemade gold pan with a few small pieces of lead fishing weights or BB pellets mixed into some sand and gravel. If you can successfully separate them through panning, your DIY pan will work for gold!
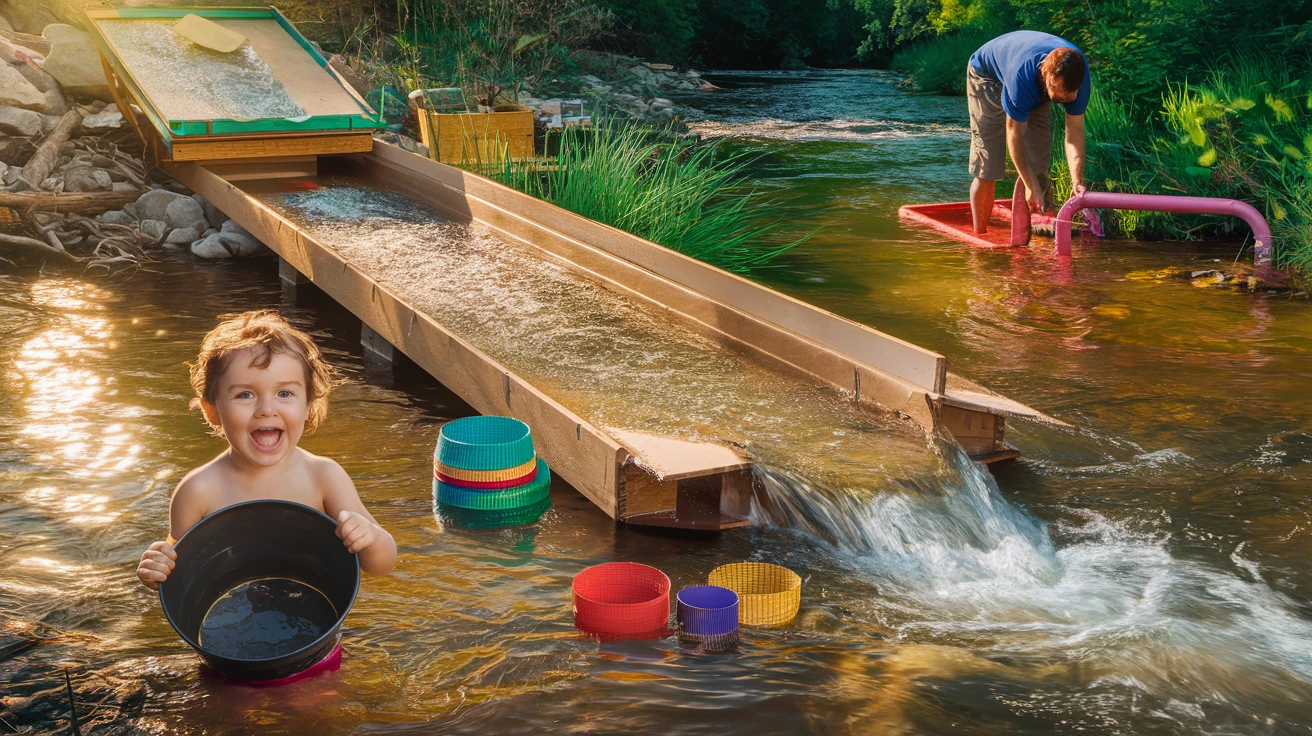
2. DIY Sluice Box for Efficient Prospecting
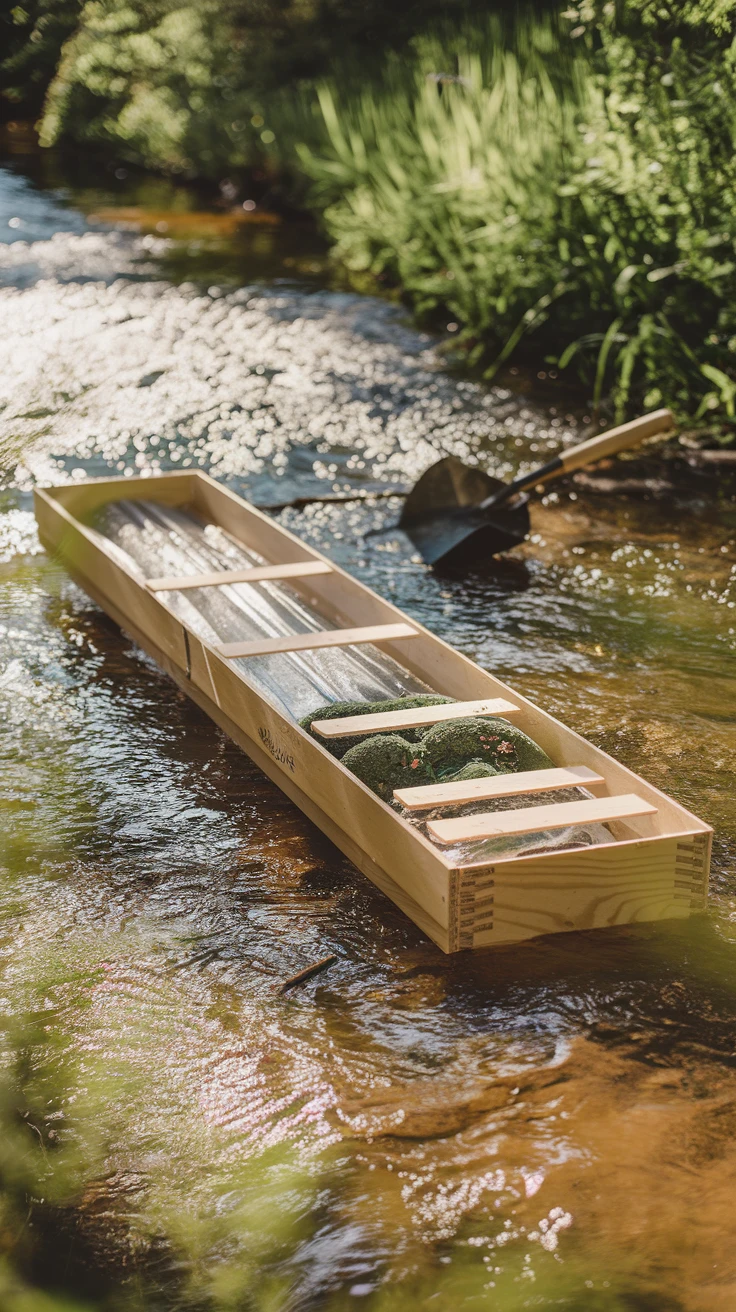
A sluice box is essentially a gold panning automation tool that lets running water do most of the separation work for you. Building your own sluice box is one of the most rewarding DIY gold panning equipment projects, as it significantly increases the amount of material you can process. My first DIY sluice doubled my gold recovery in a single weekend!
- Use waterproof plywood, plastic sheeting, or repurposed rain gutters for the main channel
- Create a box approximately 24-36 inches long and 6-10 inches wide
- Add riffles using wood strips, plastic molding, or even folded metal
- Install miner’s moss, indoor/outdoor carpet, or rubber mat material to catch fine gold
- Add support legs that allow for adjustable angles (usually 5-15 degrees)
- Cut your chosen material to size for the bottom and sides
- Assemble the box using waterproof glue, screws, or rivets
- Install riffles perpendicular to water flow, spaced 1-2 inches apart
- Secure your gold-catching material between riffles
- Add adjustable legs or supports to control the angle
A DIY sluice box transforms your gold panning experience from a single-pan operation to a more efficient system. When properly set up in a stream with good flow, your homemade sluice can process several buckets of material while you focus on digging and feeding material. This efficiency means more potential for finding gold with less back-breaking work.

View on AmazonAs an Amazon Associate, I earn from qualifying purchases.

View on AmazonAs an Amazon Associate, I earn from qualifying purchases.
Pro tip: For maximum efficiency, create a classifier (see next section) that matches the width of your sluice box, allowing you to pre-screen material directly into the sluice.
3. Homemade Gold Classifiers
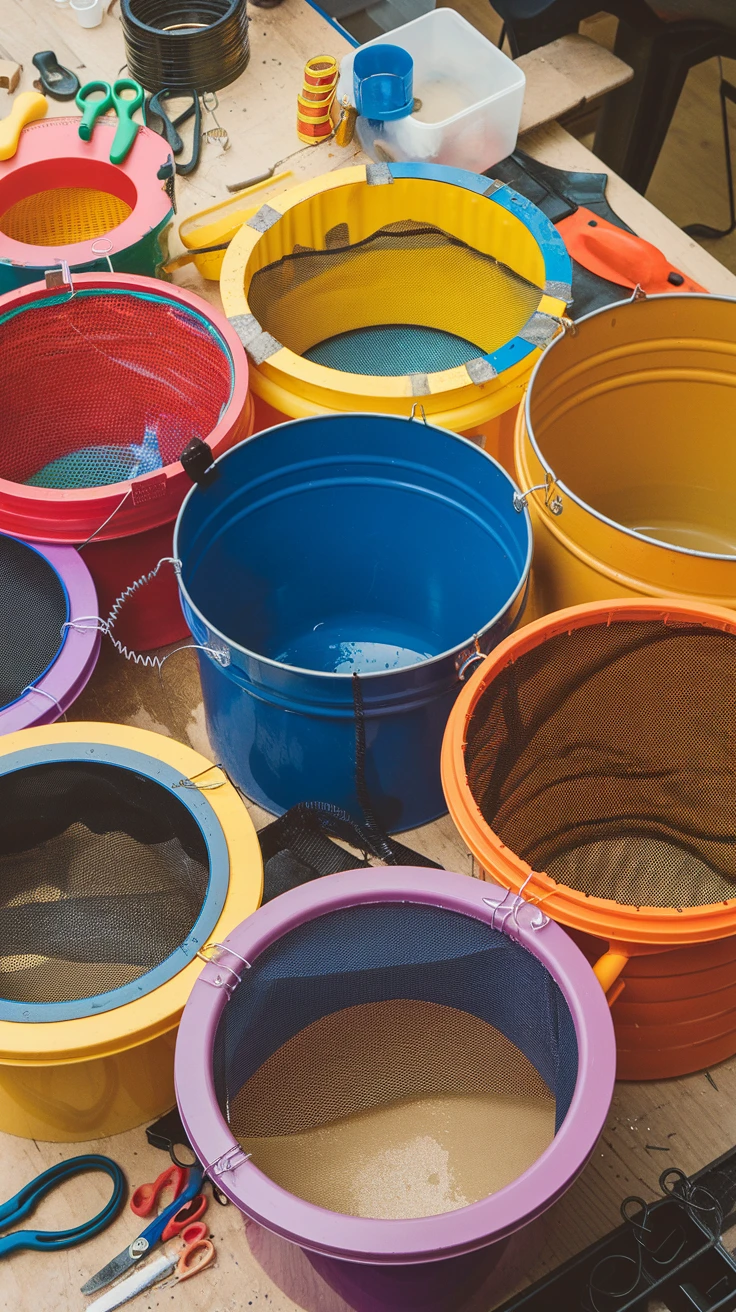
Classifiers are essentially sieves that help separate material by size before panning or sluicing. Creating your own set of classifiers is among the easiest DIY gold panning equipment projects and will dramatically improve your efficiency. I once wasted hours processing material that should have been pre-classified – don’t make the same mistake!
- Use plastic buckets, large food containers, or plant pots as the frame
- Source different mesh sizes: 1/2″, 1/4″, 1/8″, and 1/16″ are most useful
- Hardware cloth, window screen, or mesh from old strainers work perfectly
- Create a set of nesting classifiers for progressive screening
- Consider adding handles for easier shaking and manipulation
- Cut the bottom out of your container, leaving a sturdy rim
- Cut mesh slightly larger than the opening
- Secure mesh to the rim using zip ties, wire, or staples
- Seal edges with waterproof tape or silicone to prevent material escaping
- Create multiple classifiers with progressively finer mesh
Using a set of DIY classifiers will transform your gold panning process. By removing larger rocks and debris before panning, you’ll focus only on material that potentially contains gold. This not only saves time but also reduces strain on your arms and back. A good classification system is the secret weapon of efficient prospectors.

View on AmazonAs an Amazon Associate, I earn from qualifying purchases.

View on AmazonAs an Amazon Associate, I earn from qualifying purchases.
Pro tip: Color-code your different mesh sizes with spray paint or tape for quick identification. This helps when you’re working in a stream and need to grab the right classifier quickly.
4. DIY Snuffer Bottle for Fine Gold Collection
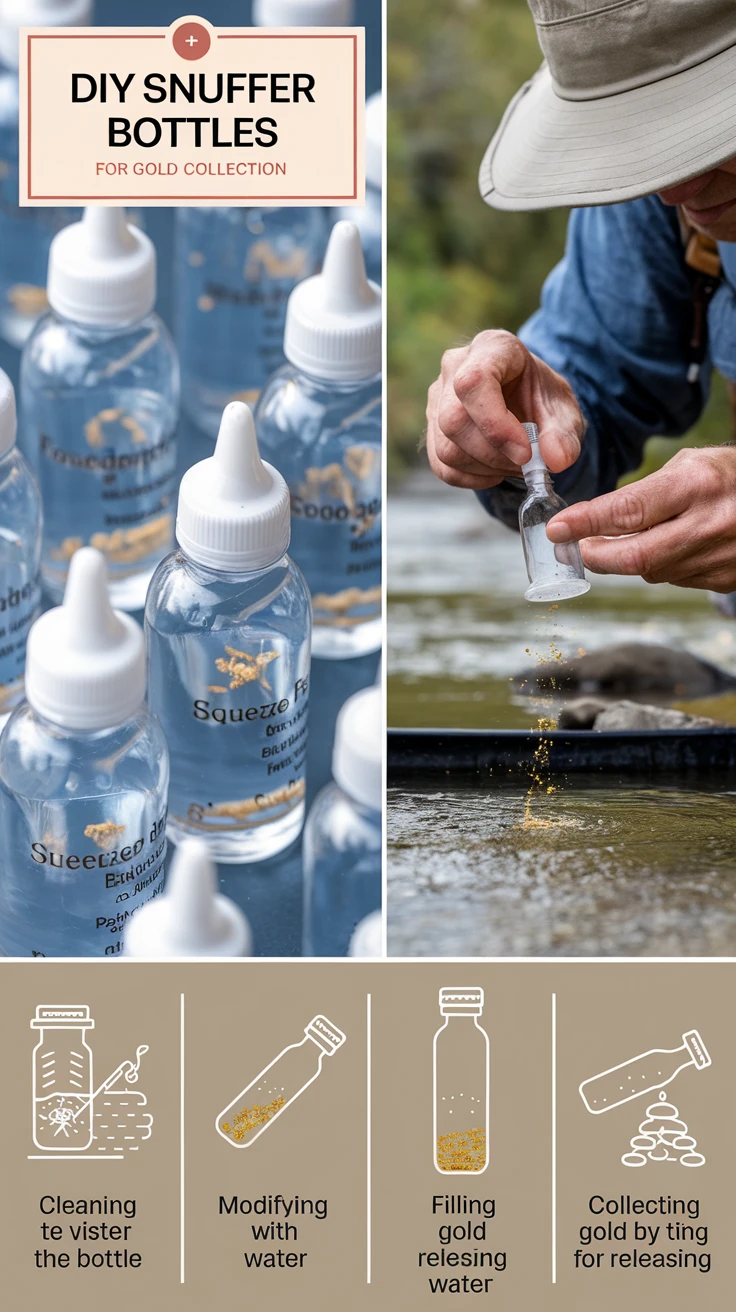
A snuffer bottle is an essential piece of DIY gold panning equipment for collecting those tiny, elusive flakes of gold that would otherwise be difficult to handle. The first time I used my homemade snuffer bottle, I was amazed at how much fine gold I had been missing with my clumsy fingers and tweezers approach.
- Use a small plastic squeeze bottle (eye drop bottles work great)
- Clear bottles allow you to see the gold you’ve collected
- Flexible plastic makes it easy to control suction
- Small tip diameter helps with precision collection
- Portable size fits easily in your prospecting kit
- Clean your chosen bottle thoroughly
- If needed, modify the tip for better precision
- Fill the bottle about 1/3 with clean water
- Squeeze the bottle, place the tip near gold flakes, and release pressure
- The vacuum created will suck up the gold and water
A snuffer bottle might seem like a minor addition to your DIY gold panning equipment arsenal, but it makes a huge difference in retaining those fine gold particles that add up over time. Many beginners lose significant amounts of gold simply because they can’t effectively collect the smallest flakes. Your homemade snuffer bottle solves this problem elegantly and inexpensively.

View on AmazonAs an Amazon Associate, I earn from qualifying purchases.

View on AmazonAs an Amazon Associate, I earn from qualifying purchases.
Pro tip: Keep a second, larger container for transferring your collected gold from the snuffer bottle. Simply squeeze the gold and water into this container at the end of your day, then let it dry before final storage.
5. DIY Hand Dredge for Reaching Difficult Spots
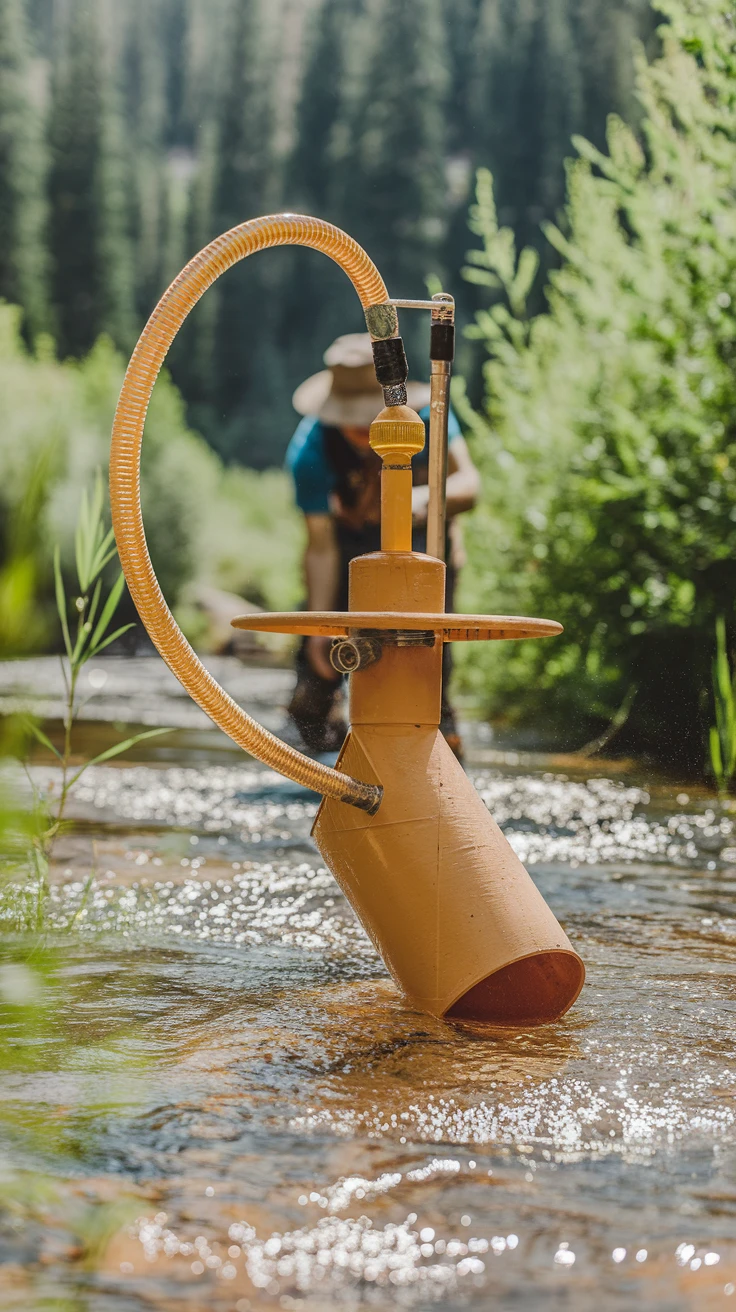
A hand dredge allows you to access material from underwater crevices and bedrock that would be impossible to reach otherwise. Creating this piece of DIY gold panning equipment opens up entirely new prospecting opportunities. I still remember the excitement of finding my first “pocket” of gold using a hand dredge I cobbled together from PVC pipe.
- Use 1-2 inch diameter PVC pipe as the main tube
- Add a flexible garden hose section for better maneuverability
- Create a simple valve system with a rubber ball or cork
- Include a comfortable handle for extended use
- Optional: Add a clear section to see material being collected
- Cut PVC pipe to desired length (usually 2-3 feet works well)
- Create a simple one-way valve at the collection end
- Add a handle or grip for comfortable operation
- Attach a collection container at the discharge end
- Test in water to ensure proper suction and discharge
A DIY hand dredge bridges the gap between simple panning and more complex powered equipment. It allows you to systematically sample underwater areas that might contain concentrated gold deposits. By creating suction through a simple push-pull motion, you can pull material from cracks and crevices that would otherwise remain untouched, potentially uncovering gold that others have missed.

View on AmazonAs an Amazon Associate, I earn from qualifying purchases.

View on AmazonAs an Amazon Associate, I earn from qualifying purchases.
Pro tip: When working with your hand dredge, focus on natural gold traps like bedrock cracks, the downstream side of large boulders, and inside tight crevices where rushing water would naturally deposit heavier materials.
6. Homemade Crevice Tools
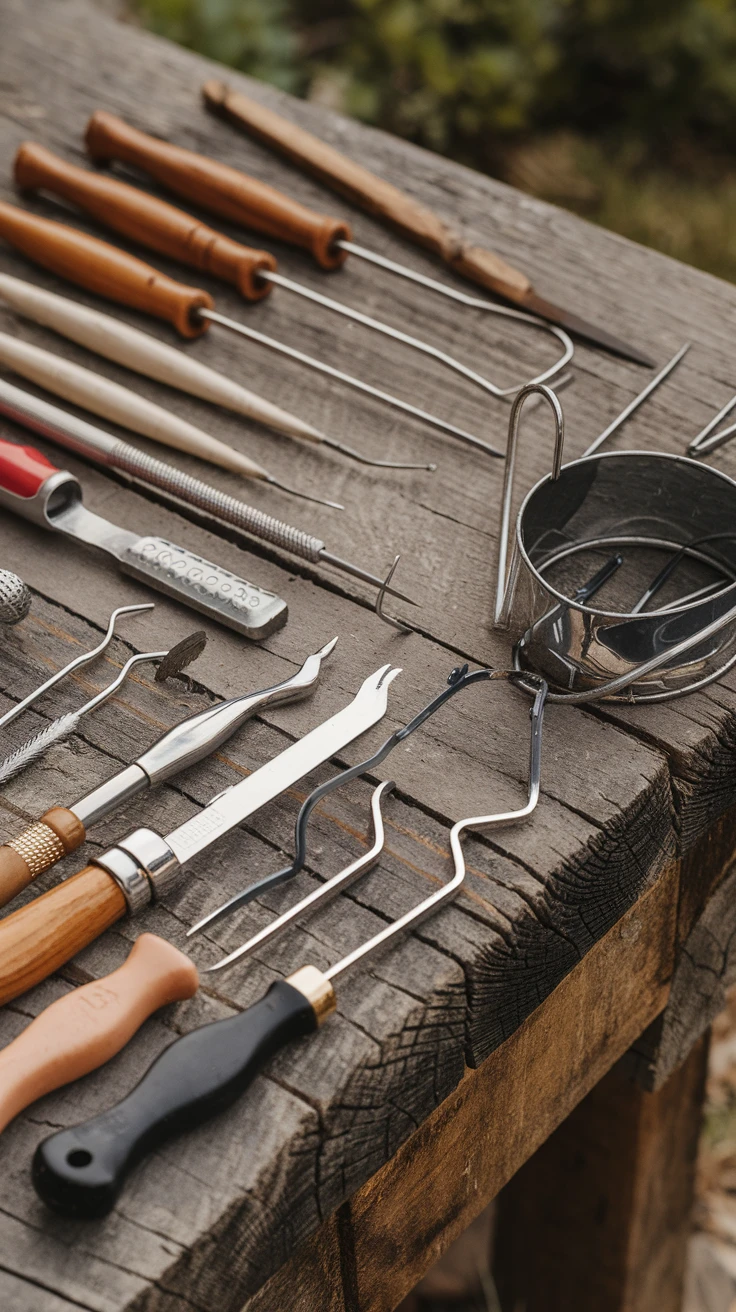
Crevice tools are specialized implements designed to extract material from tight spaces where gold often hides. This DIY gold panning equipment is essential for thorough prospecting, as gold has an uncanny ability to work its way into the smallest cracks. My most valuable gold nugget came from a crevice I almost passed by until I used my homemade tool to investigate.
- Repurpose old dental picks, screwdrivers, or butter knives
- Use metal coat hangers for creating custom shapes
- Add wooden or rubber handles for comfort and grip
- Create various tip shapes for different crevice types
- Include both rigid and flexible options in your toolkit
- Select appropriate base materials for modification
- Shape the working end to suit different crevice types
- Create hooks, picks, and flat scrapers for versatility
- Add comfortable handles using tape, rubber, or wood
- Test tools on various crack types to ensure effectiveness
A set of DIY crevice tools can make the difference between finding gold and going home empty-handed. Professional prospectors know that gold often hides in the most inaccessible places, and having the right tool to extract material from these spots is crucial. By creating your own specialized crevice tools, you’ll be able to thoroughly investigate promising areas that casual panners might overlook.

View on AmazonAs an Amazon Associate, I earn from qualifying purchases.

View on AmazonAs an Amazon Associate, I earn from qualifying purchases.
Pro tip: Attach a small container or bag directly to your crevice tool setup to catch material as you extract it, preventing the loss of fine gold during the collection process.
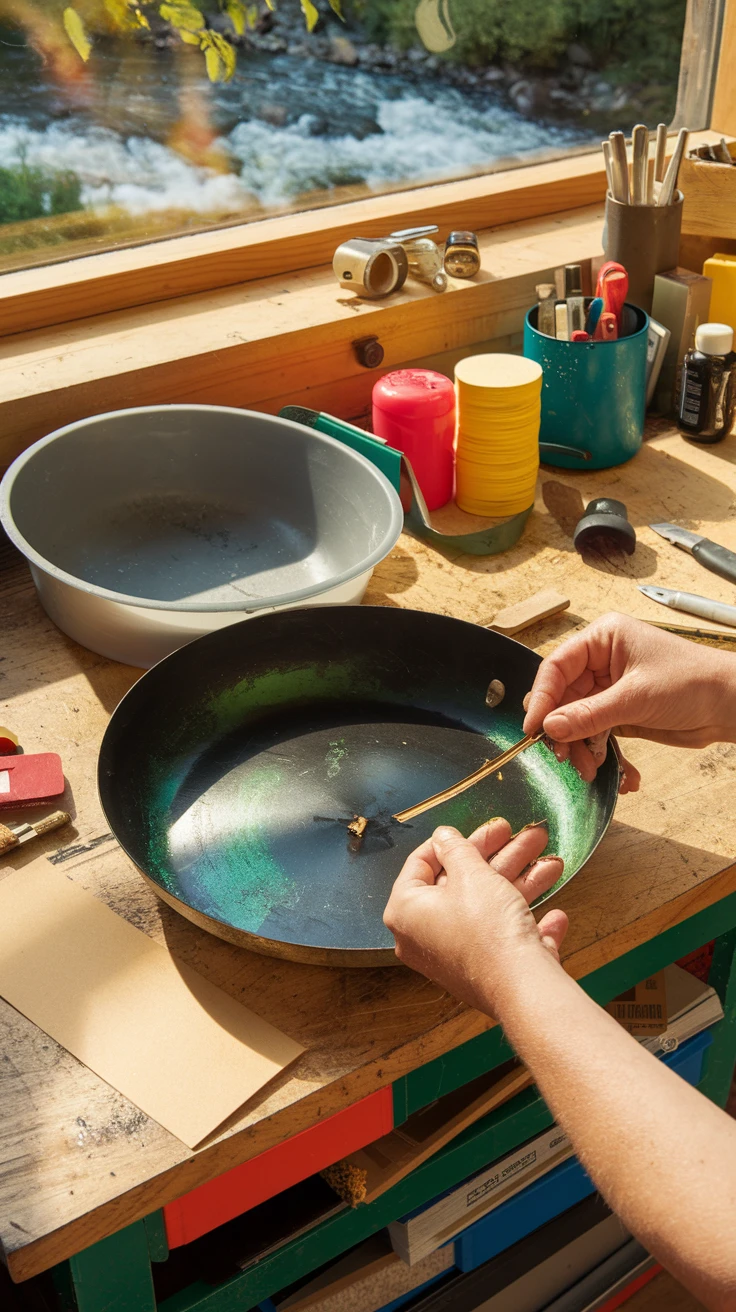
7. DIY Black Sand Magnet Separator

One of the most challenging aspects of gold panning is separating gold from black sand in your final concentrates. Creating a magnetic black sand separator is a clever piece of DIY gold panning equipment that makes this process much easier. The first time I used my homemade magnetic separator, I was shocked at how quickly it cleaned up my concentrates.
- Use rare earth magnets (neodymium works best)
- Create a protective covering using plastic straws or pen casings
- Consider a “magnetic wand” design for precise control
- Add a release mechanism to easily drop collected black sand
- Include a comfortable handle for extended use
- Obtain strong magnets from hardware stores or old electronics
- Create a protective covering to prevent direct contact with concentrates
- Attach magnets to a handle or wand for easy manipulation
- Add a sliding mechanism to release collected black sand
- Test with known black sand to ensure proper function
A magnetic separator is invaluable when processing the final stages of your concentrates. Black sand (primarily magnetite and other magnetic minerals) often makes up the bulk of the heavy material left in your pan along with any gold. By creating a DIY magnetic separator, you can quickly remove these magnetic minerals, making it much easier to spot and collect the gold. This tool dramatically reduces the time spent on the final, most tedious part of the gold recovery process.

View on AmazonAs an Amazon Associate, I earn from qualifying purchases.

View on AmazonAs an Amazon Associate, I earn from qualifying purchases.
Pro tip: Use your magnetic separator in a shallow container of water rather than directly in your pan. This allows the magnets to pull black sand through the water without disturbing the gold, resulting in cleaner separation.
Key Takeaways About DIY Gold Panning Equipment
- Creating your own gold panning equipment saves money while allowing for customization
- Start with basic tools like a pan and classifier before moving to more complex projects
- Most DIY gold panning equipment can be made with common household items or inexpensive materials
- Having a complete set of tools (from classification to fine gold collection) maximizes your recovery
- Testing your equipment before heading to the field ensures functionality when it matters
Conclusion
Embarking on the adventure of gold panning doesn’t require expensive, store-bought equipment. With these seven DIY gold panning equipment ideas, you can create a complete prospecting kit that rivals commercial offerings at a fraction of the cost. The satisfaction of finding gold with tools you’ve crafted yourself adds an extra dimension to the already exciting hobby of gold prospecting.
Remember that gold panning is as much about the journey as the destination. The time spent crafting your equipment builds valuable knowledge about how each tool functions, making you a more effective prospector. Whether you’re hoping to strike it rich or simply enjoy connecting with nature and history, your DIY gold panning equipment will serve as faithful companions on your gold hunting adventures.
So gather your materials, set aside some time for crafting, and prepare to experience the thrill of gold panning with your very own handmade tools. The streams and rivers are waiting, and with your DIY gold panning equipment in hand, you’re ready to uncover the treasures they hold.
Frequently Asked Questions
How effective is DIY gold panning equipment compared to store-bought options?
DIY gold panning equipment can be just as effective as commercial options when properly constructed. The functionality depends more on design and technique than on whether the tool was purchased or homemade. Many experienced prospectors prefer their custom-made equipment because it’s tailored to their specific needs and preferences.
What is the most important piece of DIY gold panning equipment for beginners?
A good quality gold pan is the most essential tool for beginners. It’s the foundation of all gold prospecting and teaches the fundamental skills needed before advancing to other equipment. Focus on creating a durable pan with smooth surfaces and appropriate riffles before moving on to more complex DIY projects.
How much money can I save by making my own gold panning equipment?
You can save anywhere from 50-90% compared to buying commercial equipment. A complete set of store-bought basic gold panning equipment might cost $200-300, while the DIY versions could be created for $30-50 using repurposed materials and inexpensive hardware store items.
What materials should I avoid when making DIY gold panning equipment?
Avoid using materials that can rust easily (unless properly sealed), porous materials that might trap gold particles, or anything with chemicals that could leach into waterways. Also avoid lead-based materials or anything that might contaminate the environment or pose health risks.
Do I need special tools to create DIY gold panning equipment?
Most DIY gold panning equipment can be made with basic household tools like scissors, pliers, a drill, and a utility knife. More complex projects like sluice boxes might benefit from power tools, but they’re not absolutely necessary. The beauty of DIY equipment is adapting designs to work with the tools you already have.